Suppression & Compliance
Every time you send an email, your sender reputation is on the line. If you keep emailing people who've bounced, complained, or unsubscribed, email providers will start sending your messages to spam — or block you entirely.
Score CRM protects you by automatically suppressing contacts who shouldn't receive emails. You don't have to manually clean your lists — it's handled for you.
How It Works
When something goes wrong with a delivery — a bounce, a spam complaint, or an unsubscribe — Score CRM automatically marks that contact as suppressed. Suppressed contacts are silently excluded from all future campaigns and journeys. No manual cleanup needed.
Why Contacts Get Suppressed
| Reason | What happened | How it's triggered |
|---|---|---|
| Hard bounce | The email address doesn't exist or is permanently undeliverable | Automatic — your email provider reports it |
| Soft bounce (repeated) | Temporary delivery failures that keep happening (full inbox, server issues) | Automatic — after 5 consecutive soft bounces |
| Spam complaint | The recipient clicked "Report Spam" in their email client | Automatic — your email provider reports it |
| Unsubscribe | The recipient clicked the unsubscribe link in your email | Automatic — via the unsubscribe tracking link |
| Manual | You or a team member decided to suppress them | Manual — via the Score CRM dashboard |
| Bulk import | You uploaded a CSV of emails to suppress | Manual — via CSV import |
Managing Suppressed Contacts
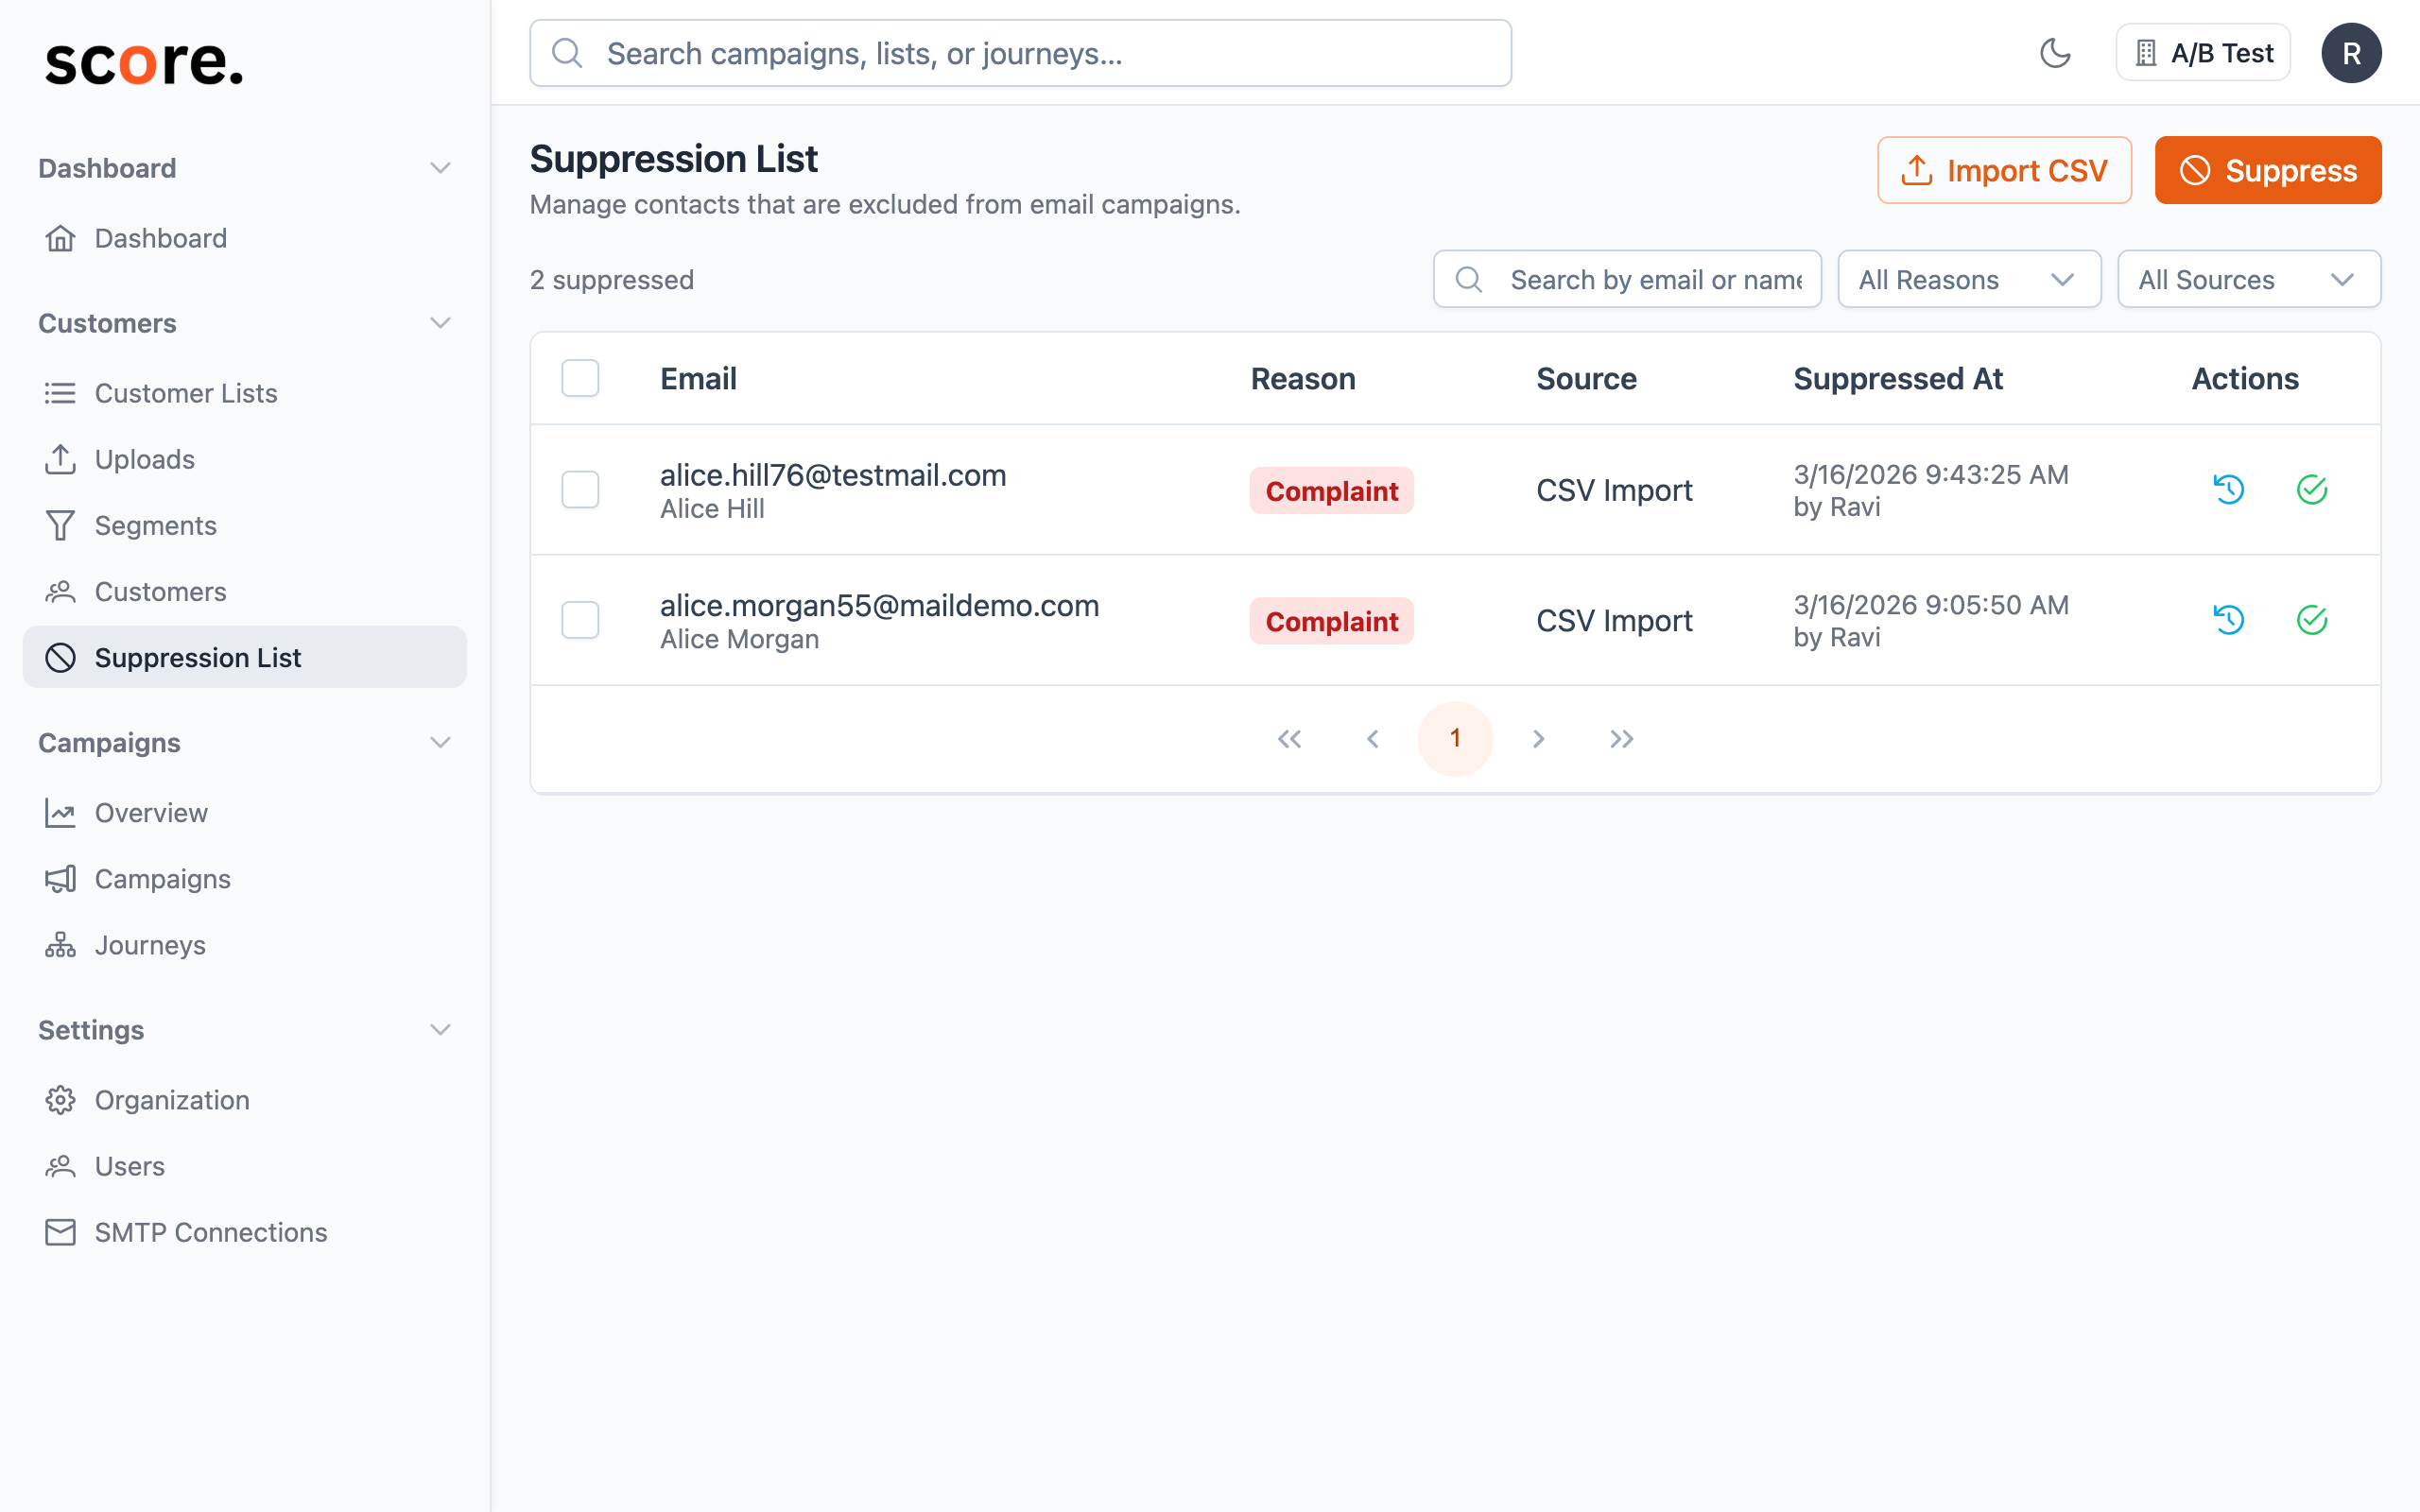
Viewing Your Suppression List
Go to Suppression in the sidebar to see all suppressed contacts. You can filter by:
- Reason — hard bounce, soft bounce, spam complaint, unsubscribe, or manual
- Source — how the suppression happened (automatic via provider, unsubscribe link, manual, CSV import)
- Date range — when the suppression occurred
Suppressing a Contact Manually
Sometimes you need to suppress a contact yourself — maybe they emailed you asking to be removed, or you know an address is invalid.
- Go to Suppression
- Click Add Suppression
- Enter the email address
- Click Suppress
Unsuppressing a Contact
Be careful with this. Only unsuppress a contact if you're sure they want to receive emails again — for example, if they reached out and confirmed. Never unsuppress contacts who filed spam complaints — this can seriously damage your sender reputation.
- Find the contact in the suppression list
- Click Unsuppress
- Confirm
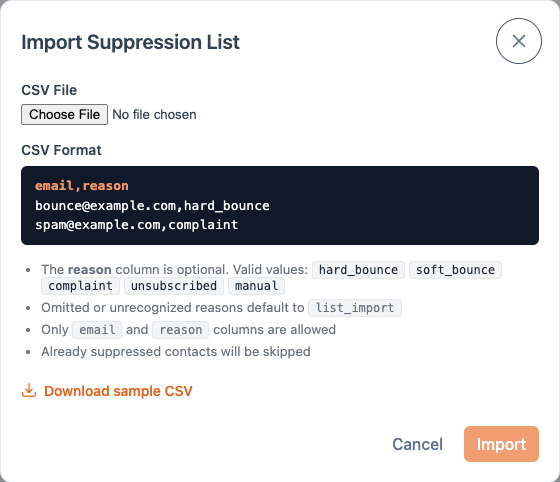
Suppressing Contacts in Bulk
Need to suppress a large batch of emails at once? Maybe you received a list of invalid addresses, or you're importing a do-not-email list from another platform.
- Go to Suppression
- Click Import CSV
- Upload a CSV file with an
emailcolumn (up to 100,000 rows, 10MB max) - Choose the suppression reason
- Submit
Audit Trail — Full Compliance Record
Every suppression and unsuppression action is permanently logged. This audit trail records:
- Which contact was affected
- What action was taken (suppressed or unsuppressed)
- Why (the reason)
- When it happened
- Who did it (for manual actions)
This log cannot be edited or deleted — giving you a complete compliance record for regulations like GDPR and CAN-SPAM.
Best Practices for a Healthy Sender Reputation
- Never unsuppress spam complaints — this is the fastest way to get blacklisted by email providers
- Watch your bounce rates — a sudden spike in bounces usually means a list quality problem. Review your recent imports
- Keep complaint rates under 0.1% — if more than 1 in 1,000 recipients report you as spam, deliverability will suffer
- Import known-bad addresses as suppressed — if you have a list of addresses you know are invalid, suppress them before sending to prevent unnecessary bounces
- Review suppression trends regularly — rising suppression rates can be an early warning sign of deliverability issues